How to Apply Coco and Eve Bronzing Foam

Welcome to the Pacific Northwest where you have the opportunity to get as dark as you can in three months. It turns out that’s hard on your skin people! Now that I’m pushing thirty I’m trying to take care of my skin and avoid wrinkles and sun spots the best I can. So in the hopes of being able to look sun-kissed throughout the year and stay looking youngish. I went on an adventure to find a tanner that would look natural, with natural ingredients. After some research, I discovered the Coco and Eve Sunny Honey Bali Bronzing Foam.
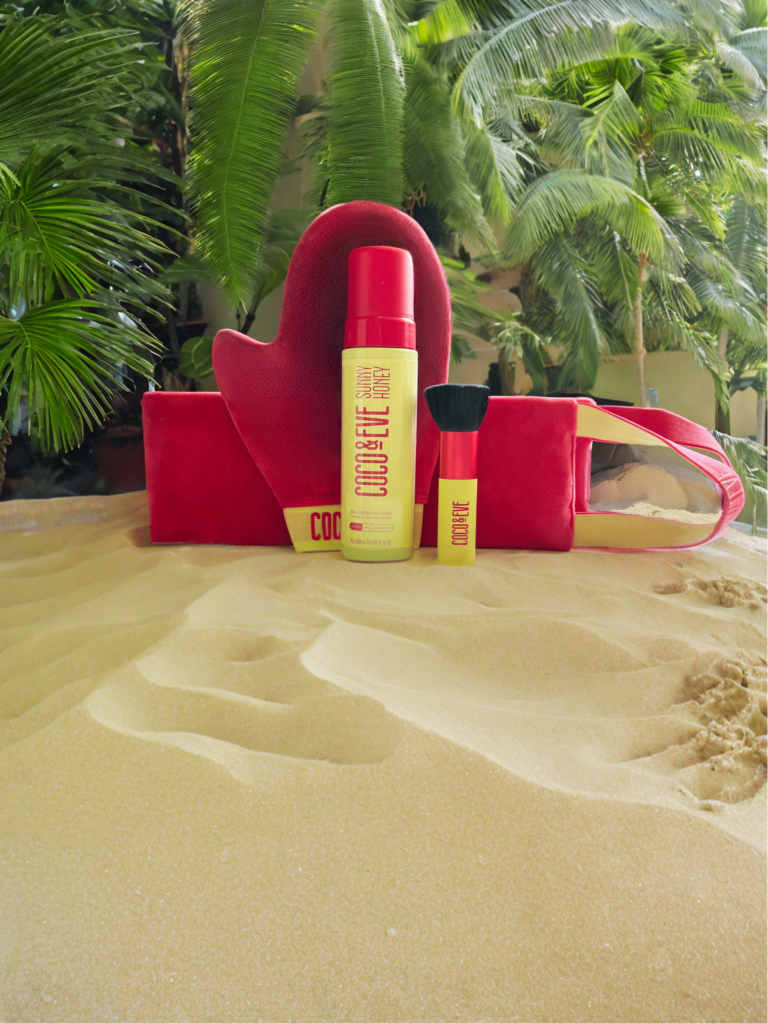
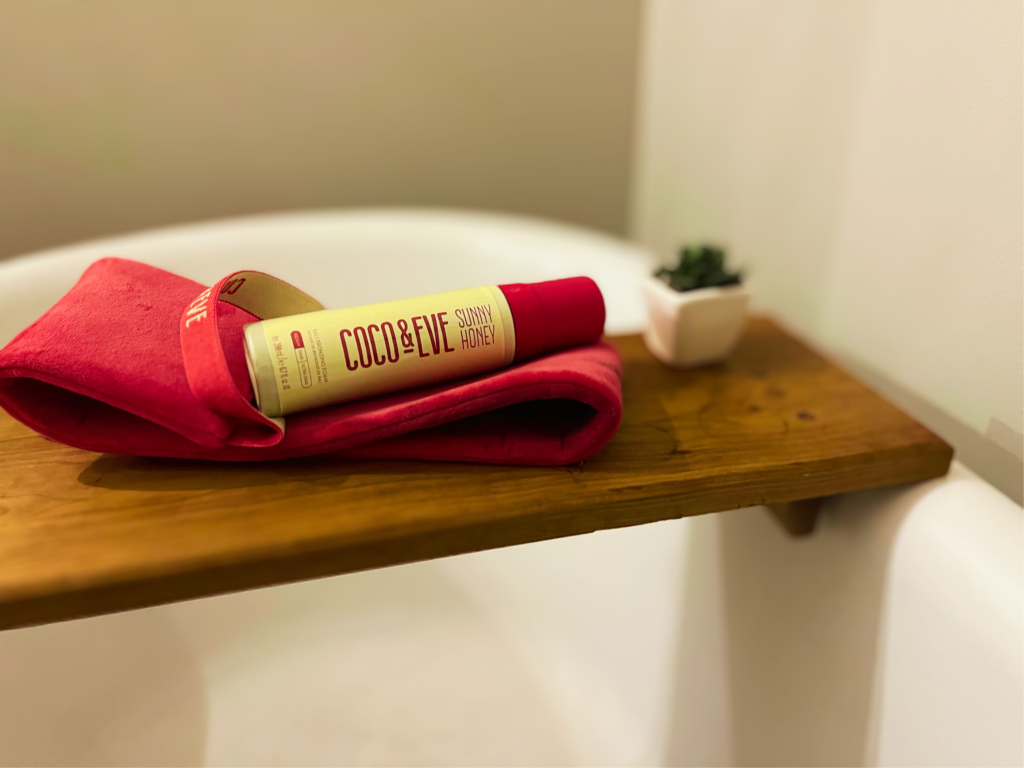
This stuff is incredible! I bought the Bali Bae Self Tan Set in medium which is the lightest color you can get. I went with that color because I was scared, I love the way it looks but next time I probably will go one darker. It came with the Foam, the Soft Velvet Mitt, the Kabuki Brush, and the Back applicator. The first thing I have to say about this company is their customer service is incredible. I got a notification saying it had shipped and I was having a hard time tracking the package so I contacted them. It turned out to be user error, but they sent me a tracking number within 24 hours of contacting them, and then messaged me the day after I received the package to make sure I did, in fact, get it. They were tracking my package also, and I appreciated that so much. I am very happy with the company as a whole.
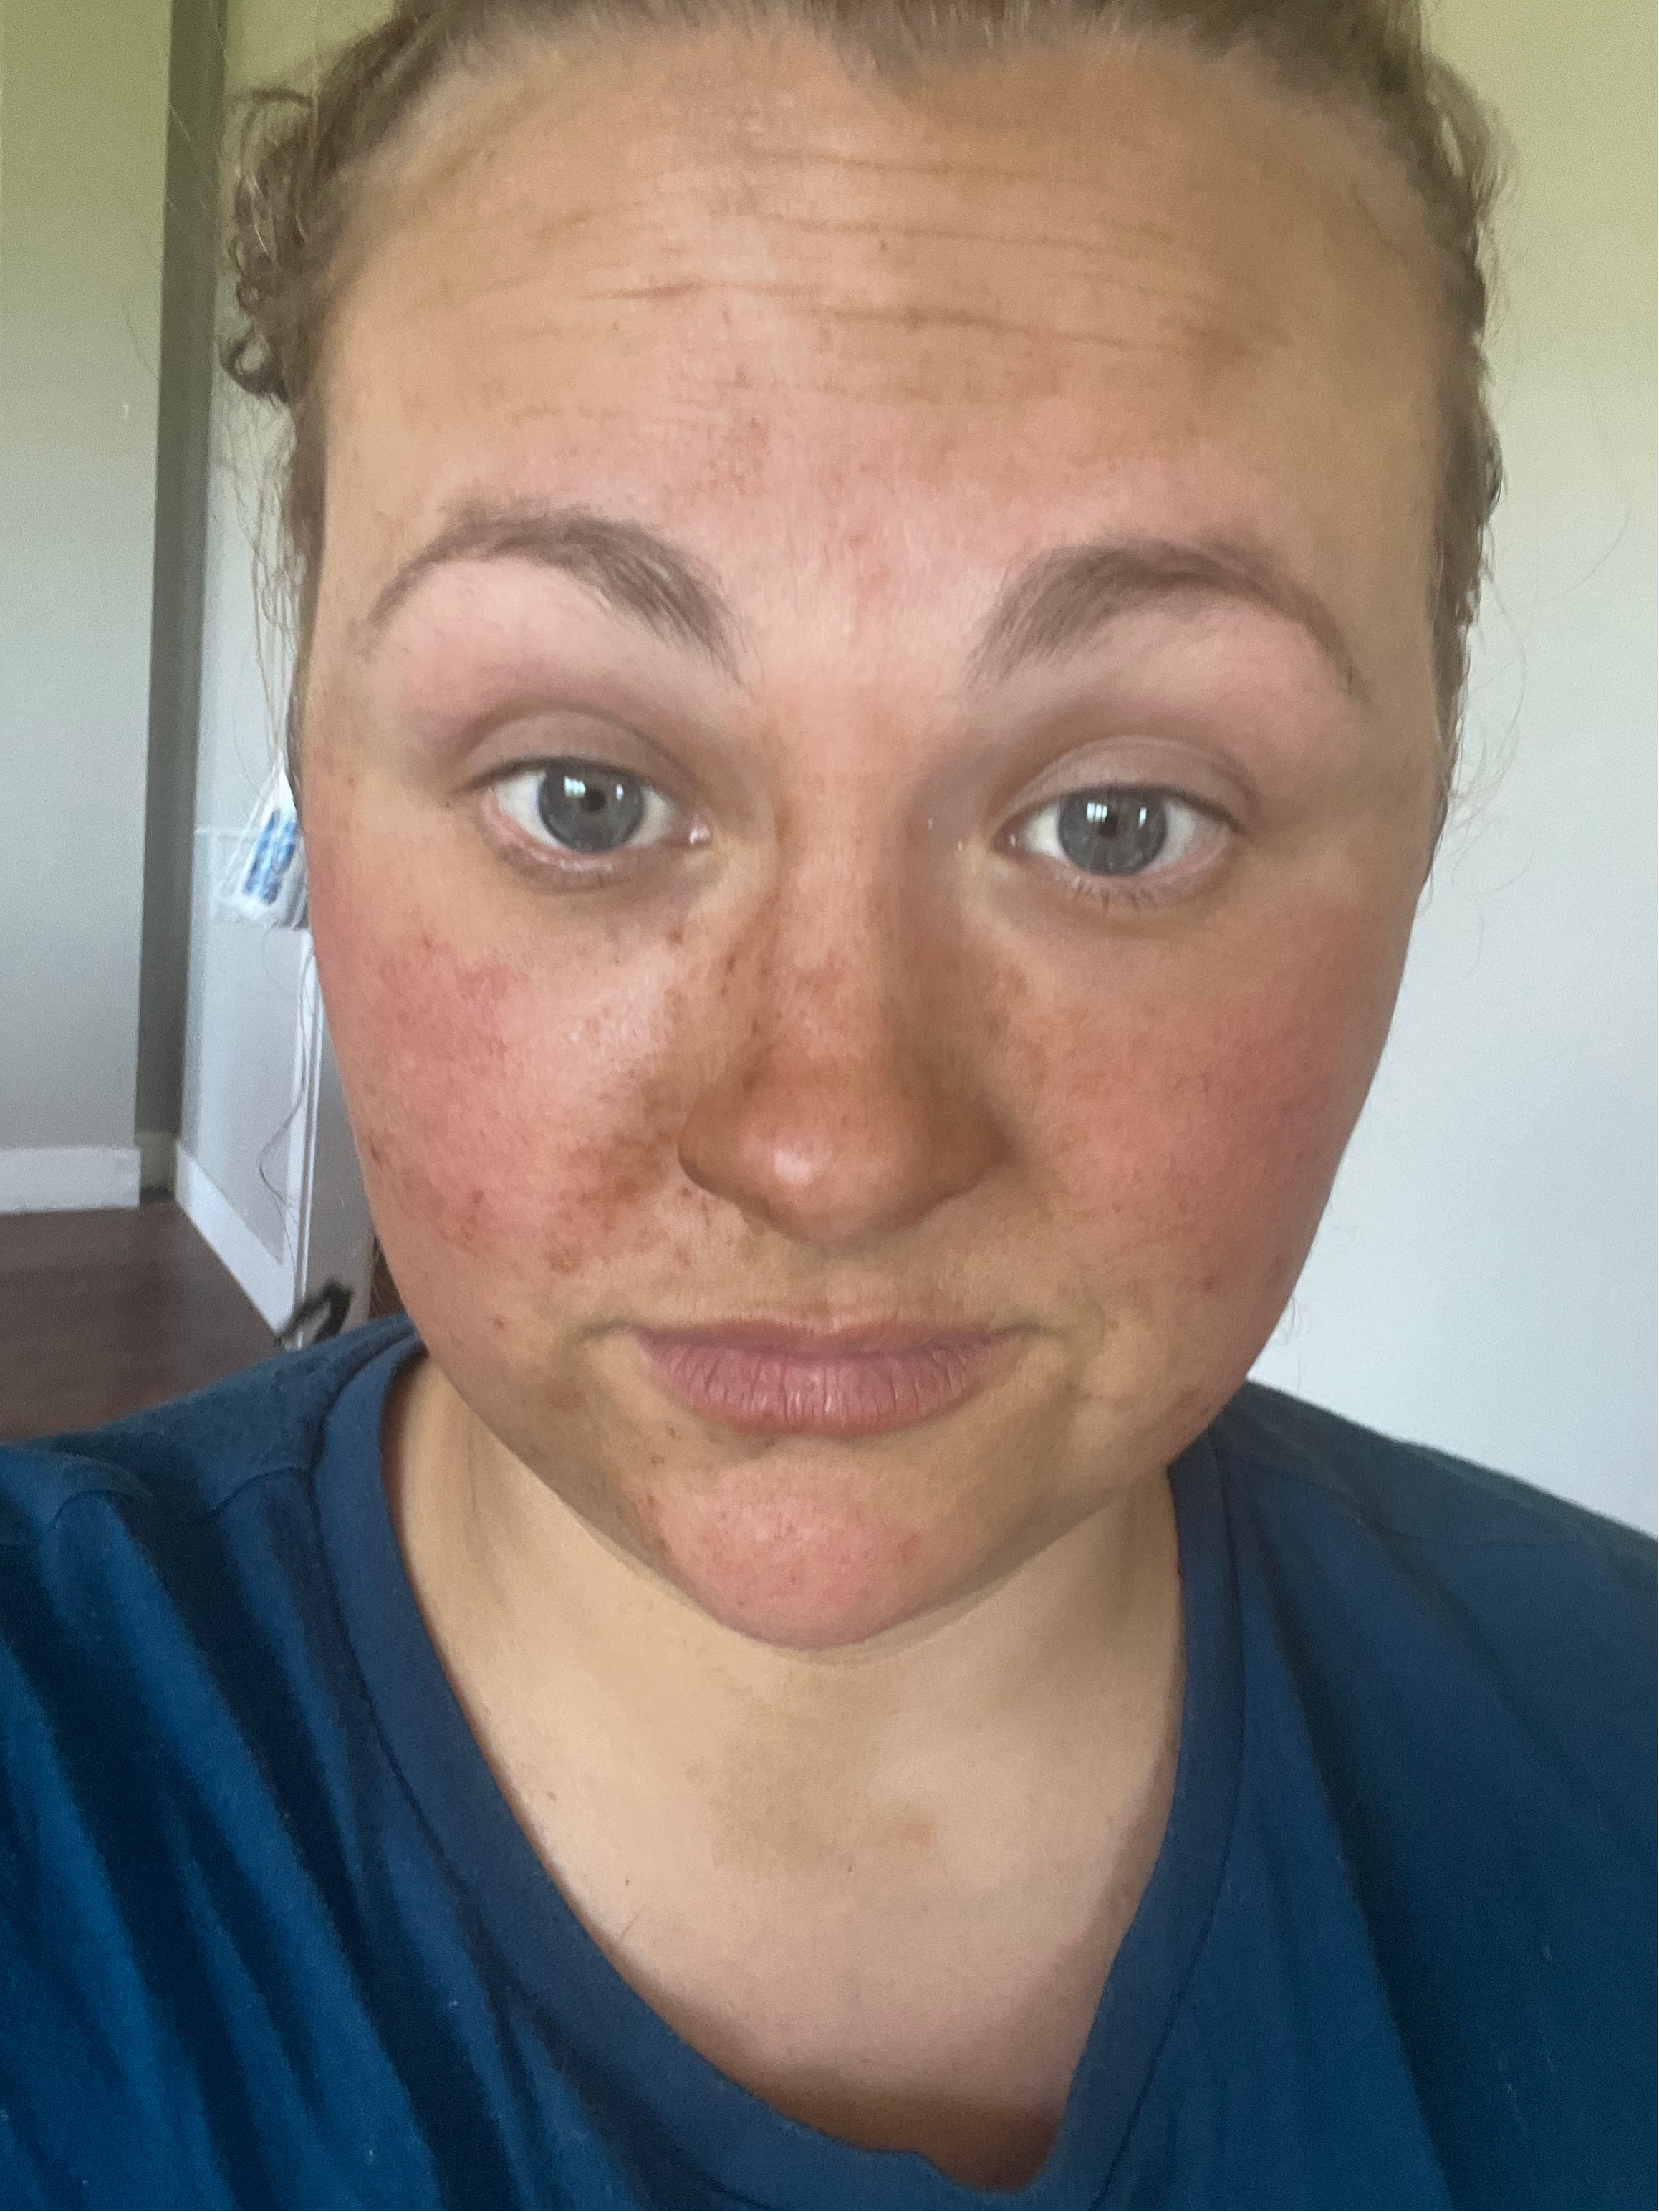
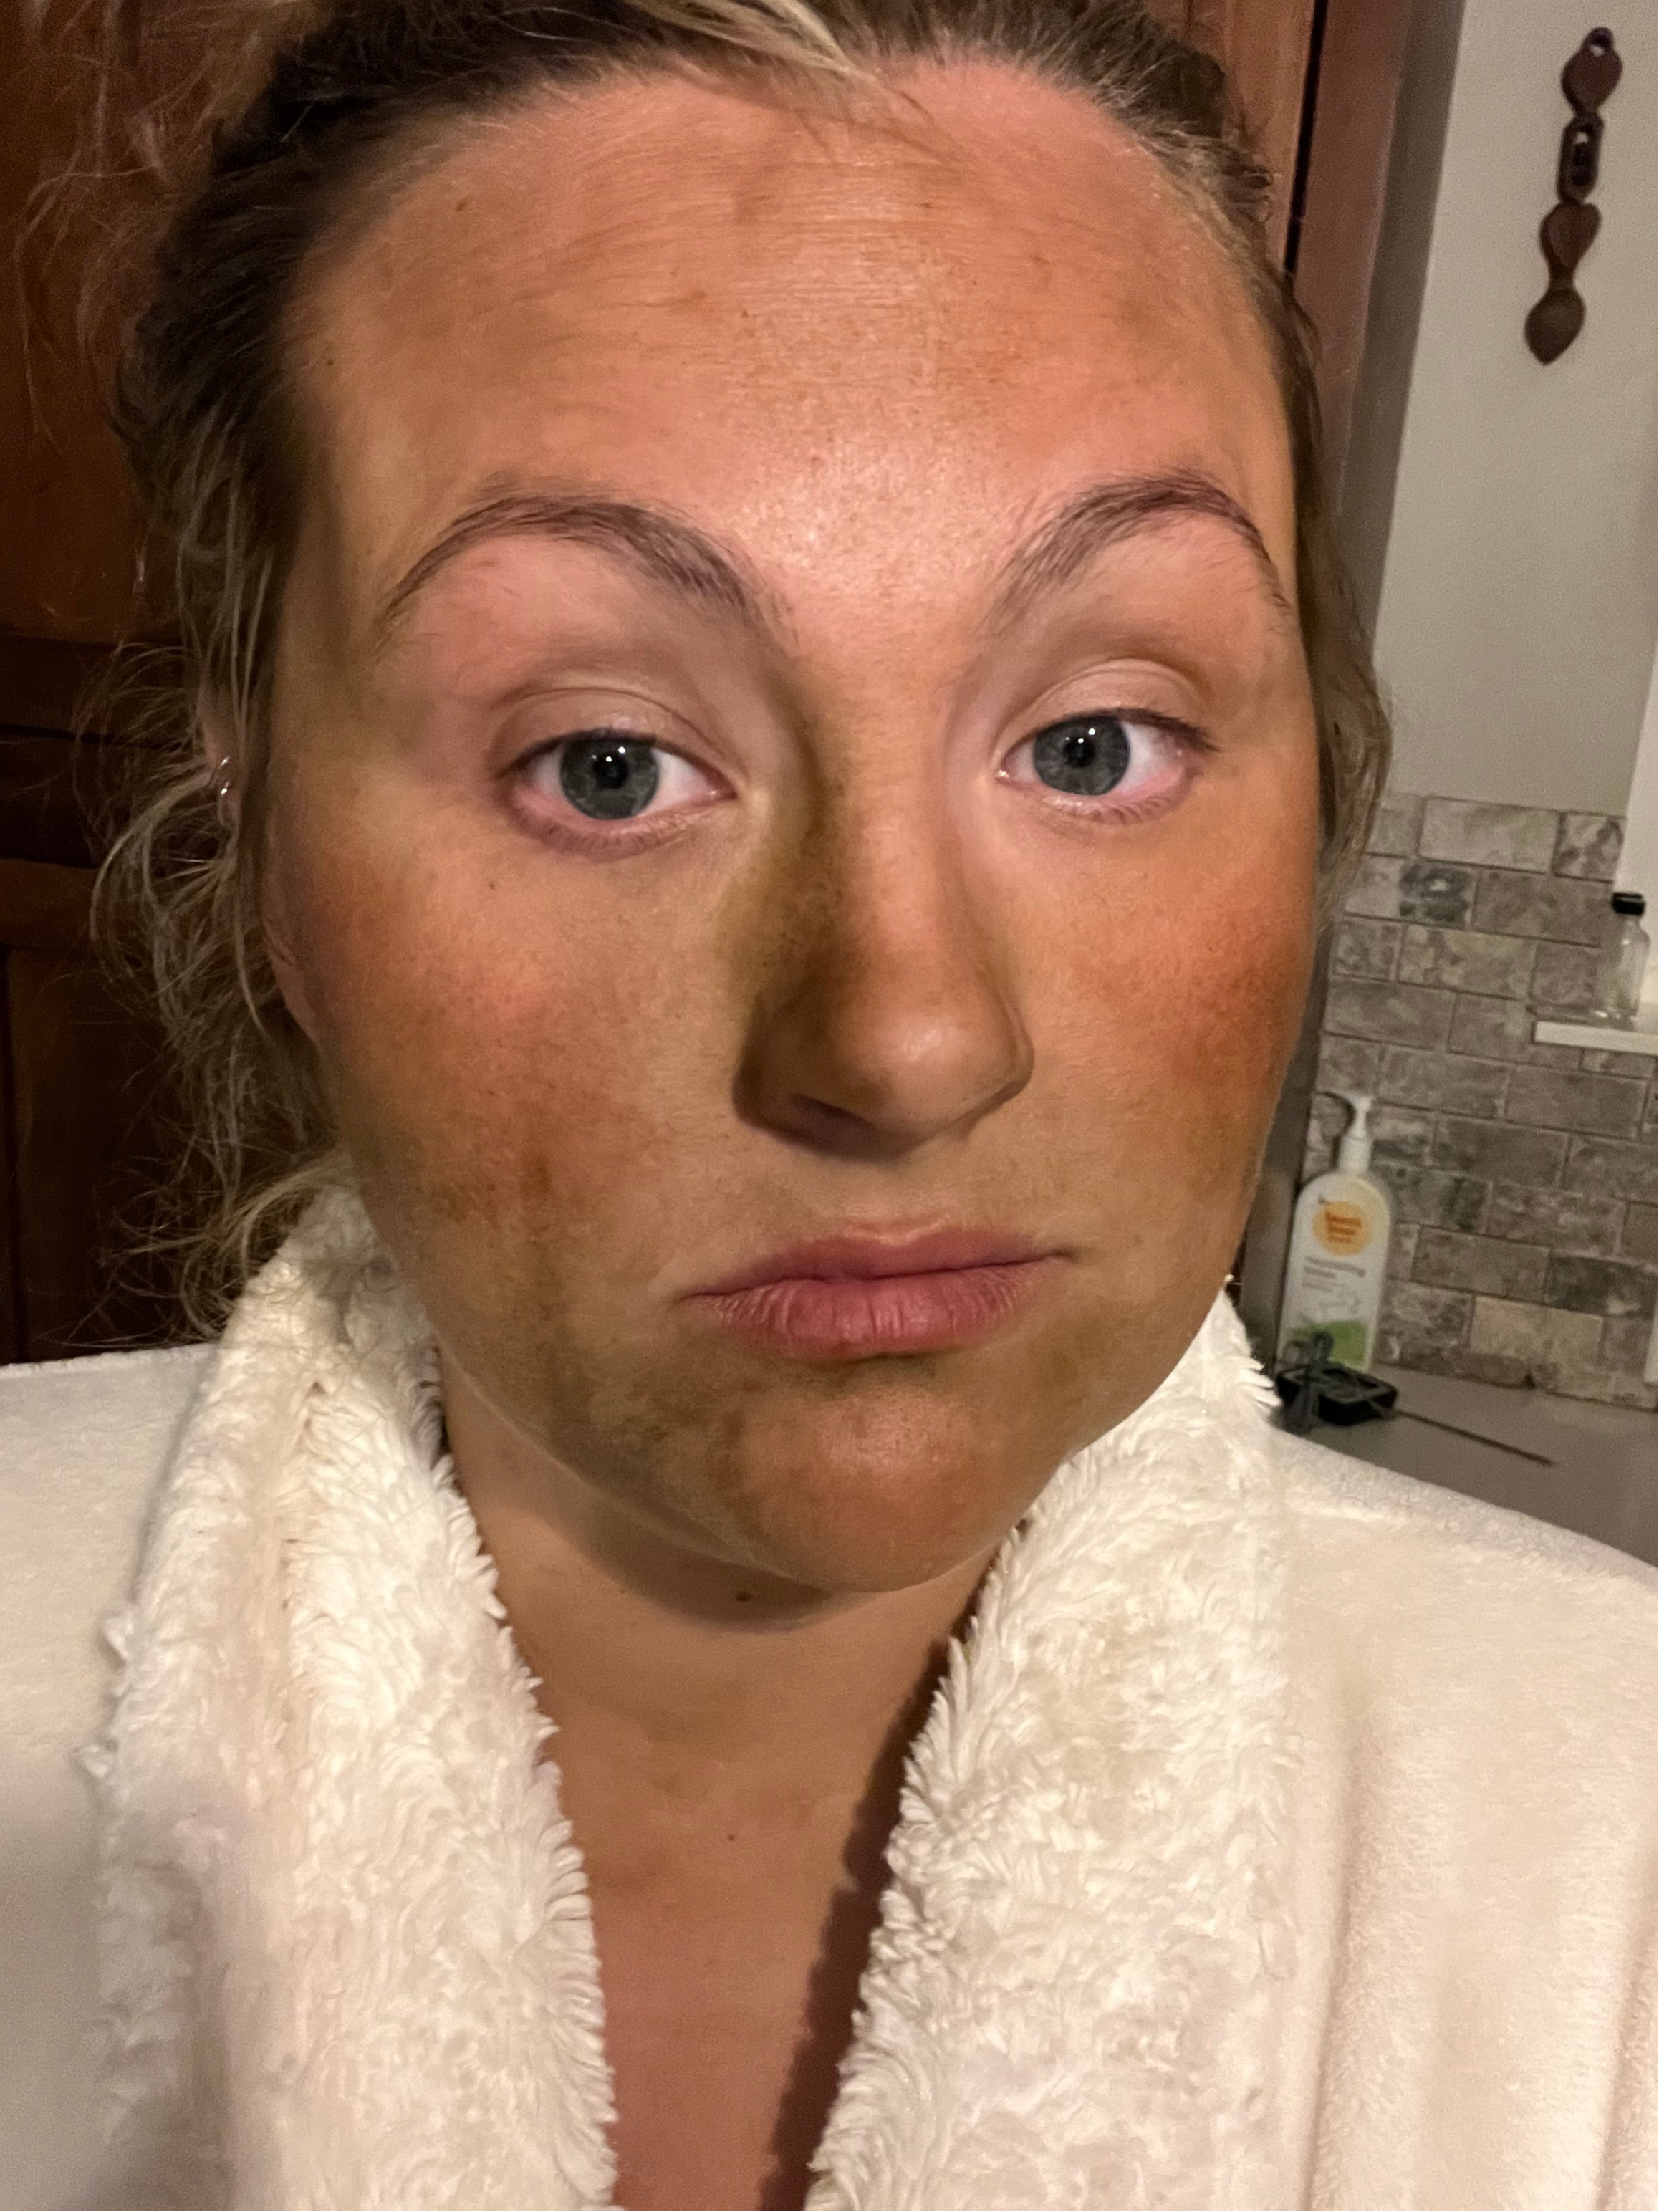
As for the product, it works soooooo good and it smells like heaven. I saw results almost immediately. I read the instructions and watched tutorials on the foam and they suggested sleeping in it over night. I am going to do it this time, but last time I was nervous because I thought it would get all over everything. I was pleasantly surprised when it did not rub off on anything, I feel confident this time that it won’t get all over my sheets. The only problem I had was when I went to the grocery store and got caught in a storm. The rain started pouring down, and it was rinsing the tanner off of me. The color was still totally there, but it was kind of getting on my clothes. That is part of the reason I am going to wear it to bed, the risk of rain goes way down when you’re in bed. Also, I have a baby so I change diapers all day long and wash my hands ALOT. I could literally see on the back of my hands where I had washed them. The last reason I am not going to wear it during the day is how it looked on my face… I am not sure if it was supposed to look this way, but my face seemed to absorb more tanner in certain spots it wasn’t a huge deal because when I wiped it off it didn’t stay blotchy. I am going to try it again, but if it doesn’t turn out better I am going to look at the face products that Coco and Eve has. I think that I probably didn’t exfoliate well enough, I thought I had but I’m gonna give it another shot. So let’s get on the application.
STEP 1: EXFOLIATE
This is so important I would suggest starting this a few days in advance, ESPECIALLY if you have dry skin. If you don’t get rid of your dry skin it will cling to those areas, and you will most likely have some darker spots. So make sure to exfoliate and apply lotion for a few days before applying the tanner. I also bought an exfoliator mitt, I got mine at Fred Meyer’s but Coco and Eve also sells one.
STEP 2: FRONT-OF-BODY APPLICATION
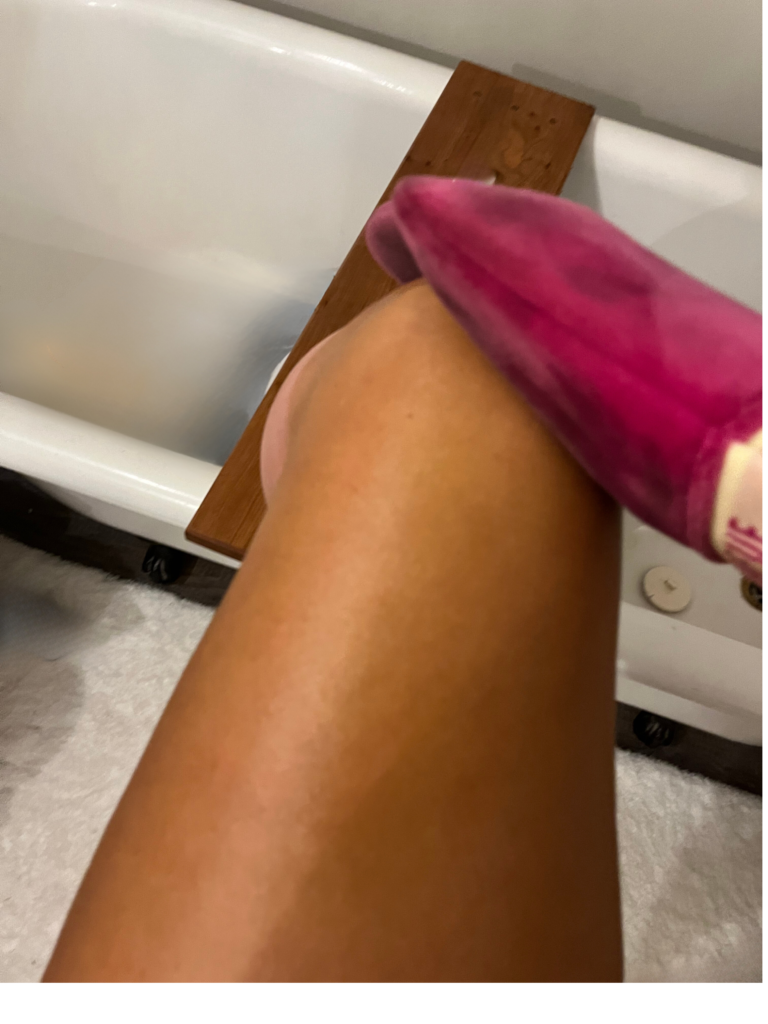
Before you start this step make sure your skin is clean of any soaps, lotions or perfumes. It’s best to do it right after the shower, but make sure you’re completely dried off. I like to put my hair up in a microfiber towel because ya know curly girl problems and it will keep it from dripping down my back. Then I start with my left arm I commit completely to the left side of my body so I don’t have to switch the mitt. I put the mitt on my right hand and put a few pumps on the mitt. I start rubbing over my arms and the rest of the left half of my body. I make sure to make little circles with my hand in order to blend the foam onto my skin. Be careful on your knees and elbows. Do not apply to thick, those areas tend to absorb the product really easily and you don’t want to have knees and elbows three shades darker than the rest of your body. I try to apply to those areas after applying somewhere else so the product is already mixed into the mitt a little, instead of apply to the mitt and directly going to the knees or elbows. Keep blending until you’re happy with the results. Reapply the product to the mitt as needed, continue until you need to swap the mitt to the other hand, and repeat for the right side.
STEP 3: BACK APPLICATION
I would highly recommend getting the back applicator it is incredibly helpful unless you have someone that has your back. It wasn’t super easy for me to get all the nooks and crannies but after a little finagling I figured it out, and without the applicator, it would be impossible. Im sure it’s easier the less body fat you have, but it’s possible even with some rolls.
STEP 4: FACE APPLICATION
The Kabuki Brush works great for the face, hands, and feet. I just use it on my face first and make sure to wash it between applications. I just apply it like a foundation. I have seen people who put it on like contour. I have not had the confidence to do that yet. If that changes in the future I will add a how-to for that. When it’s all over your face though it’s really nice. I’ve just been skipping my foundation and putting my makeup on without and it looks great.
STEP 5: HAND APPLICATION
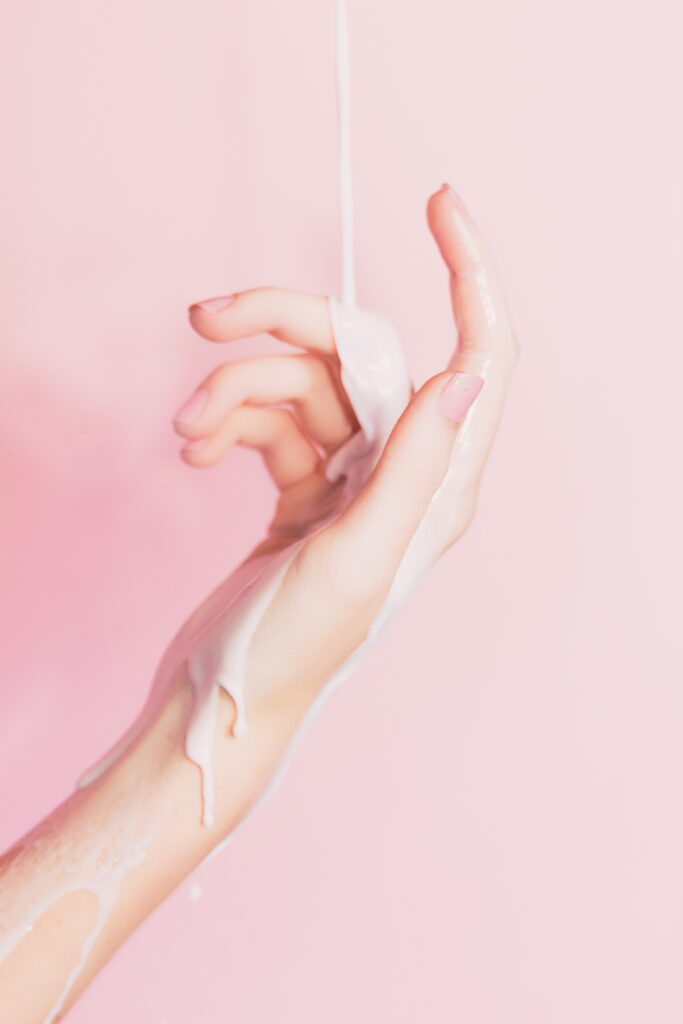
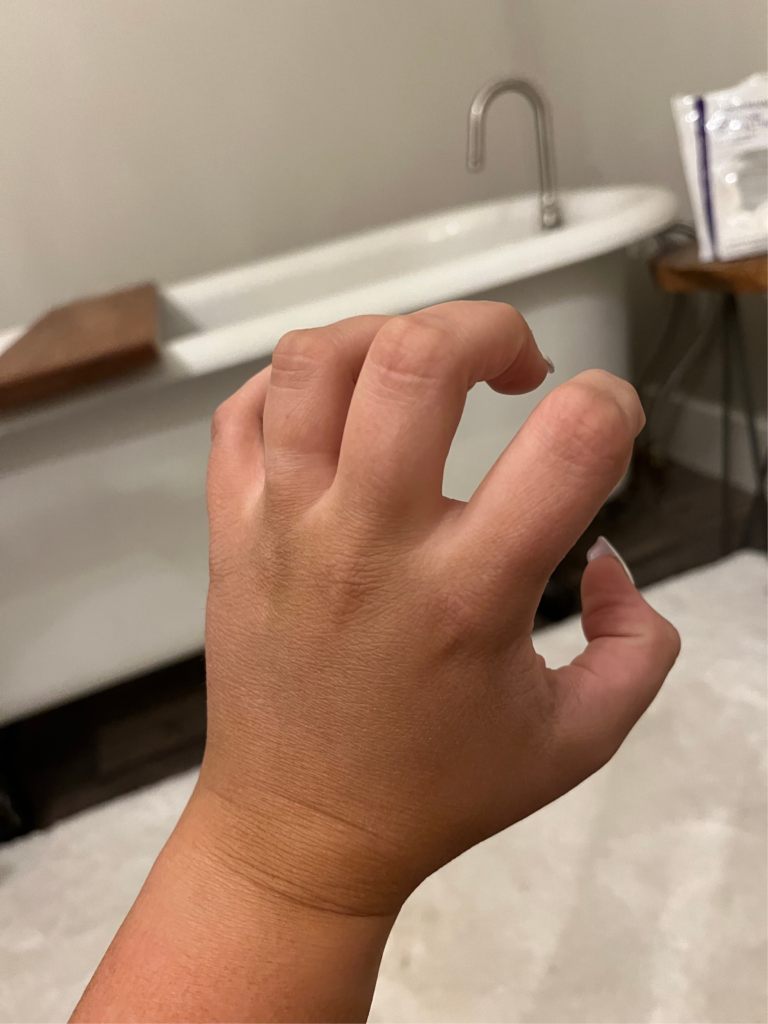
Turns out there are a lot of little cracks on your hands. Use the brush to get into all the little spots. The last thing you want is to ball your fist up to punch someone and have a white spot. So embarrassing. The best way to do this is to pretend you are a cartoon witch and curl your fingers into a claw like the picture I have on the right, and then apply. I move my fingers up and down to make sure it’s all covered.
STEP 6: FOOT APPLICATION
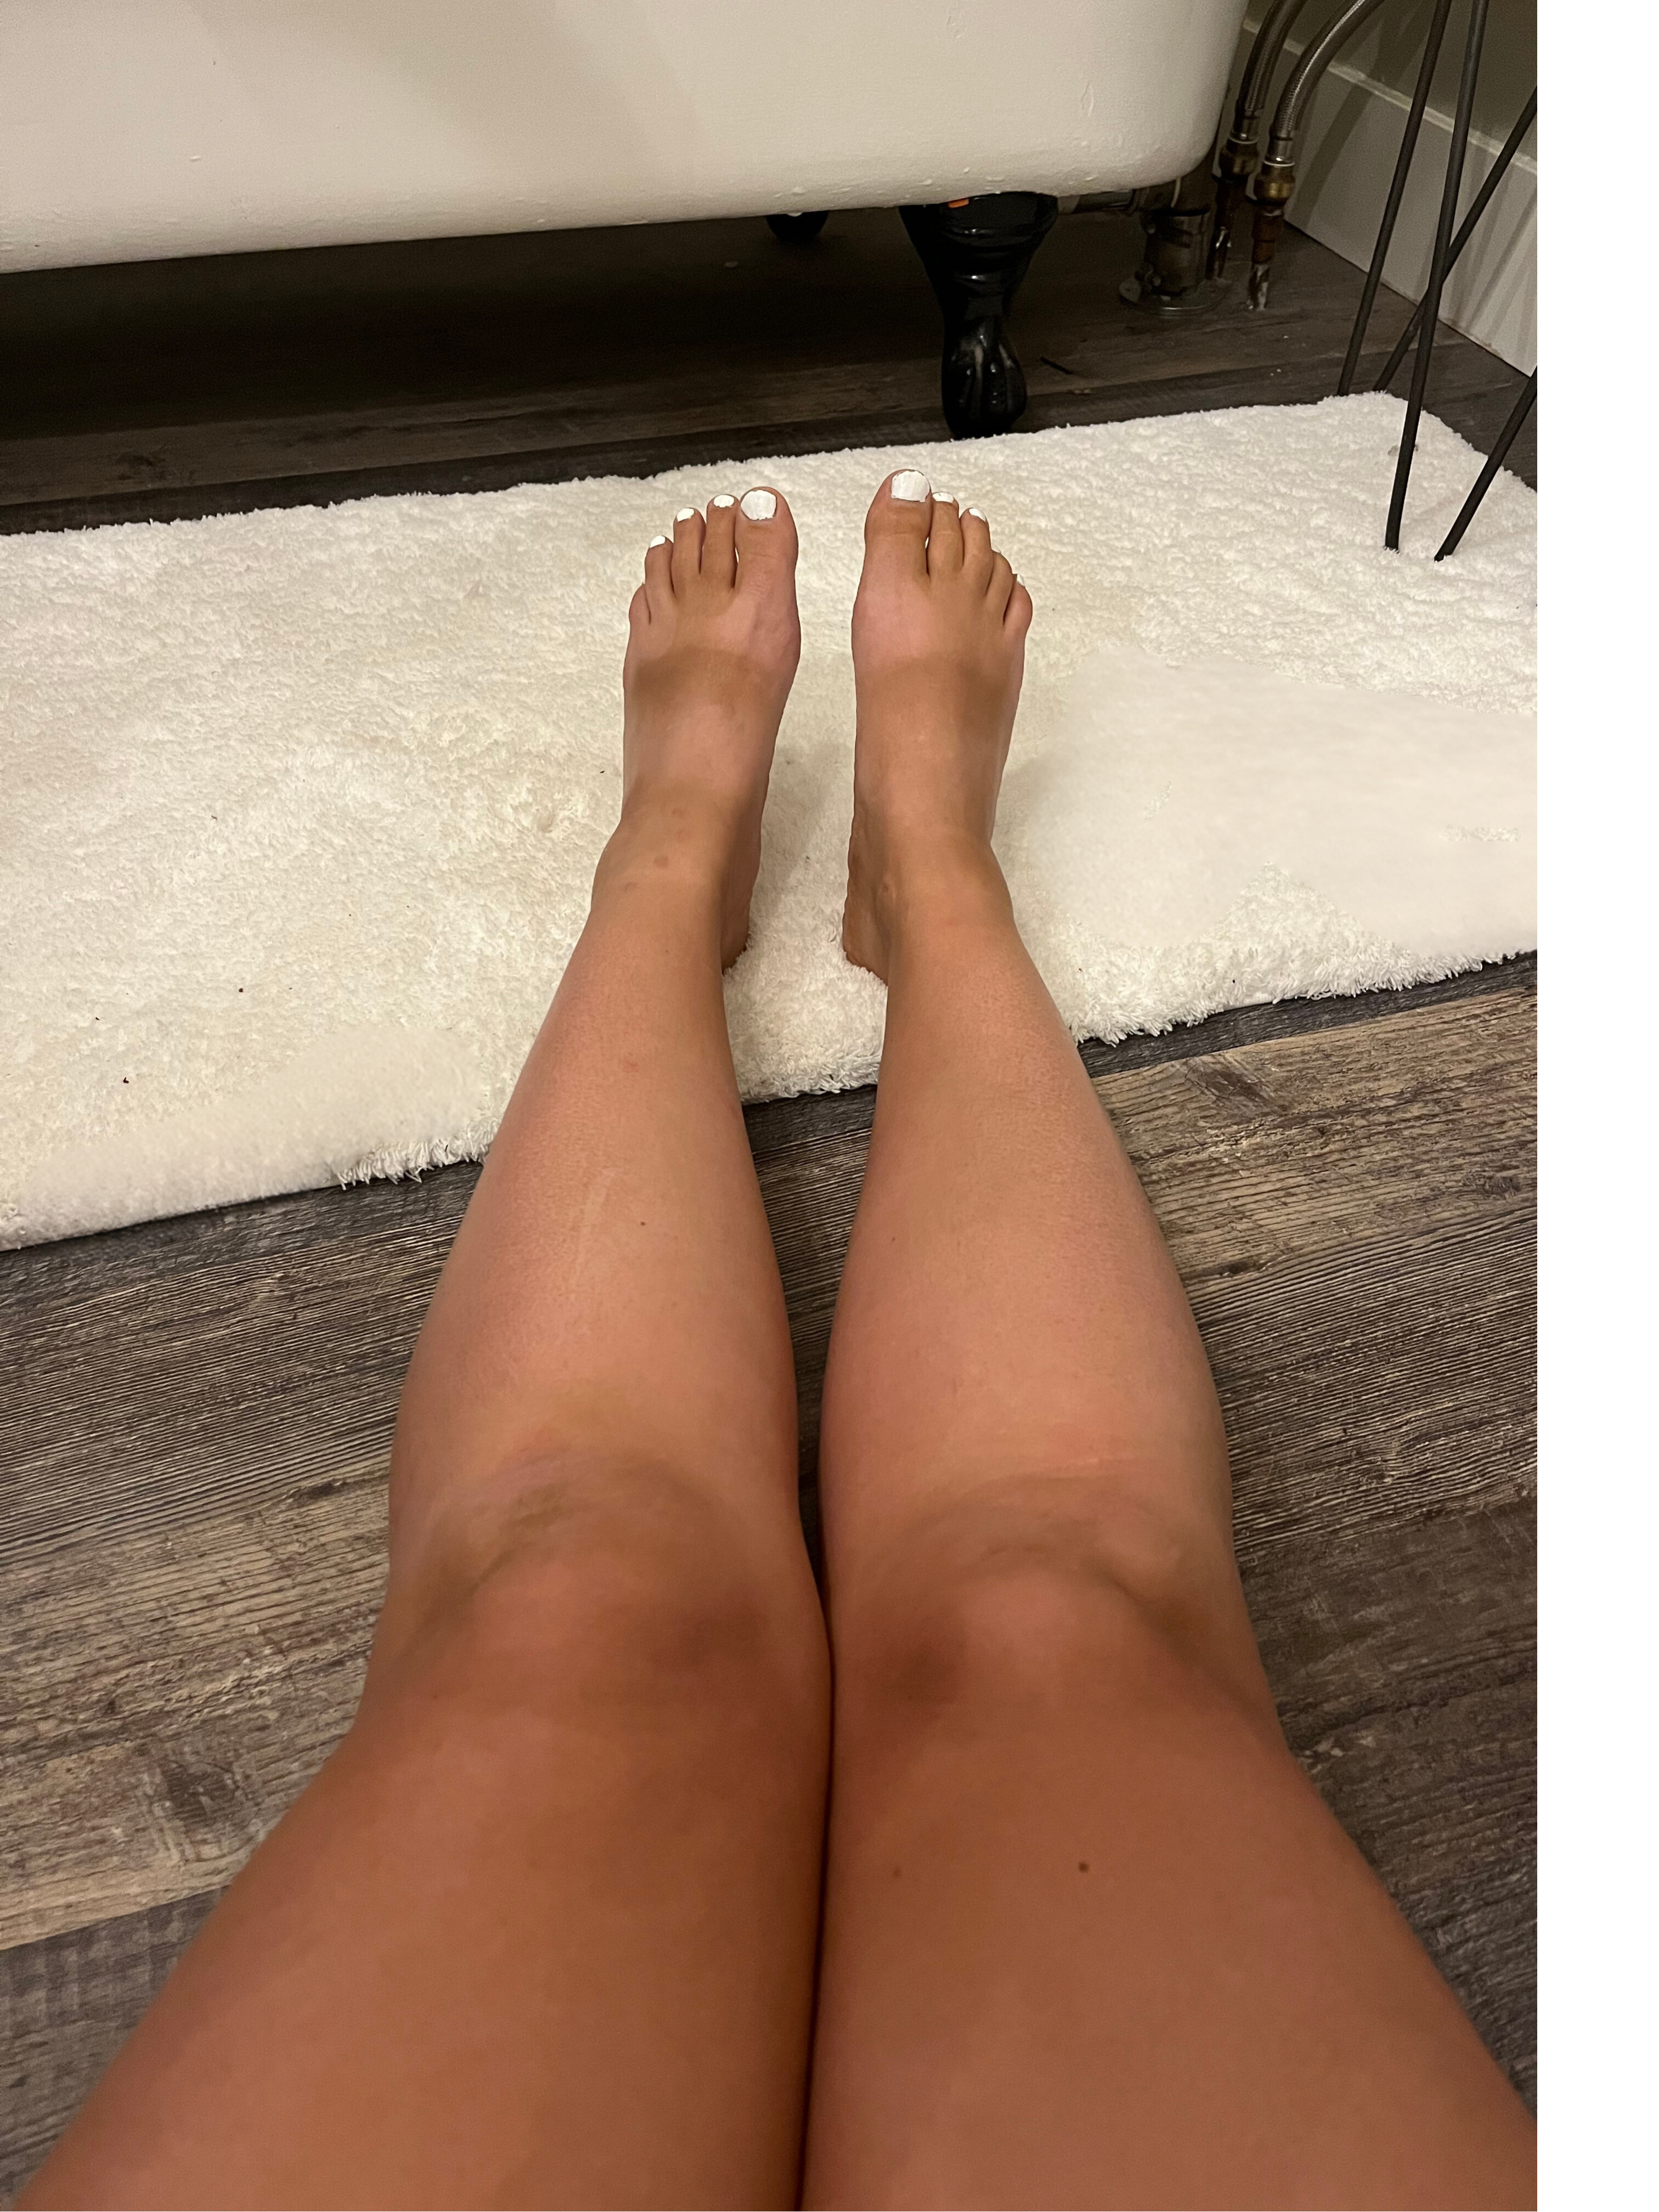
Feet are pretty easy just make sure you get between your toes and on the sides, and don’t worry about your toe polish it won’t ruin it. That’s it! You can either wait six hours or sleep on it, jump in the shower, and rinse off. I apply lotion and feel like a new woman. This stuff really is incredible and if you’re looking for a self tanner I highly recommend Cocoa and Eve.